Pages

Showing posts with label Home. Show all posts

Tuesday, December 2, 2014

Come on In....Holiday Decor!

Today I am linking up with the lovely Andrea for the last 2014 installment in her Come On In series!  I have absolutely loved this link up - participating and checking out everyone's posts.  A big thanks to Andrea for hosting!


Fist up the kitchen.  Some cute red sparkly snowflakes to jazz up the white cabinets....

The window above the sink gets a little pizazz too!  The ornament banner and shadow box are homemade craft projects.  I love them and the memories of when I made them with friends!
The Christmas tree handprint art is new this year thanks to my sweet little boy.  :)


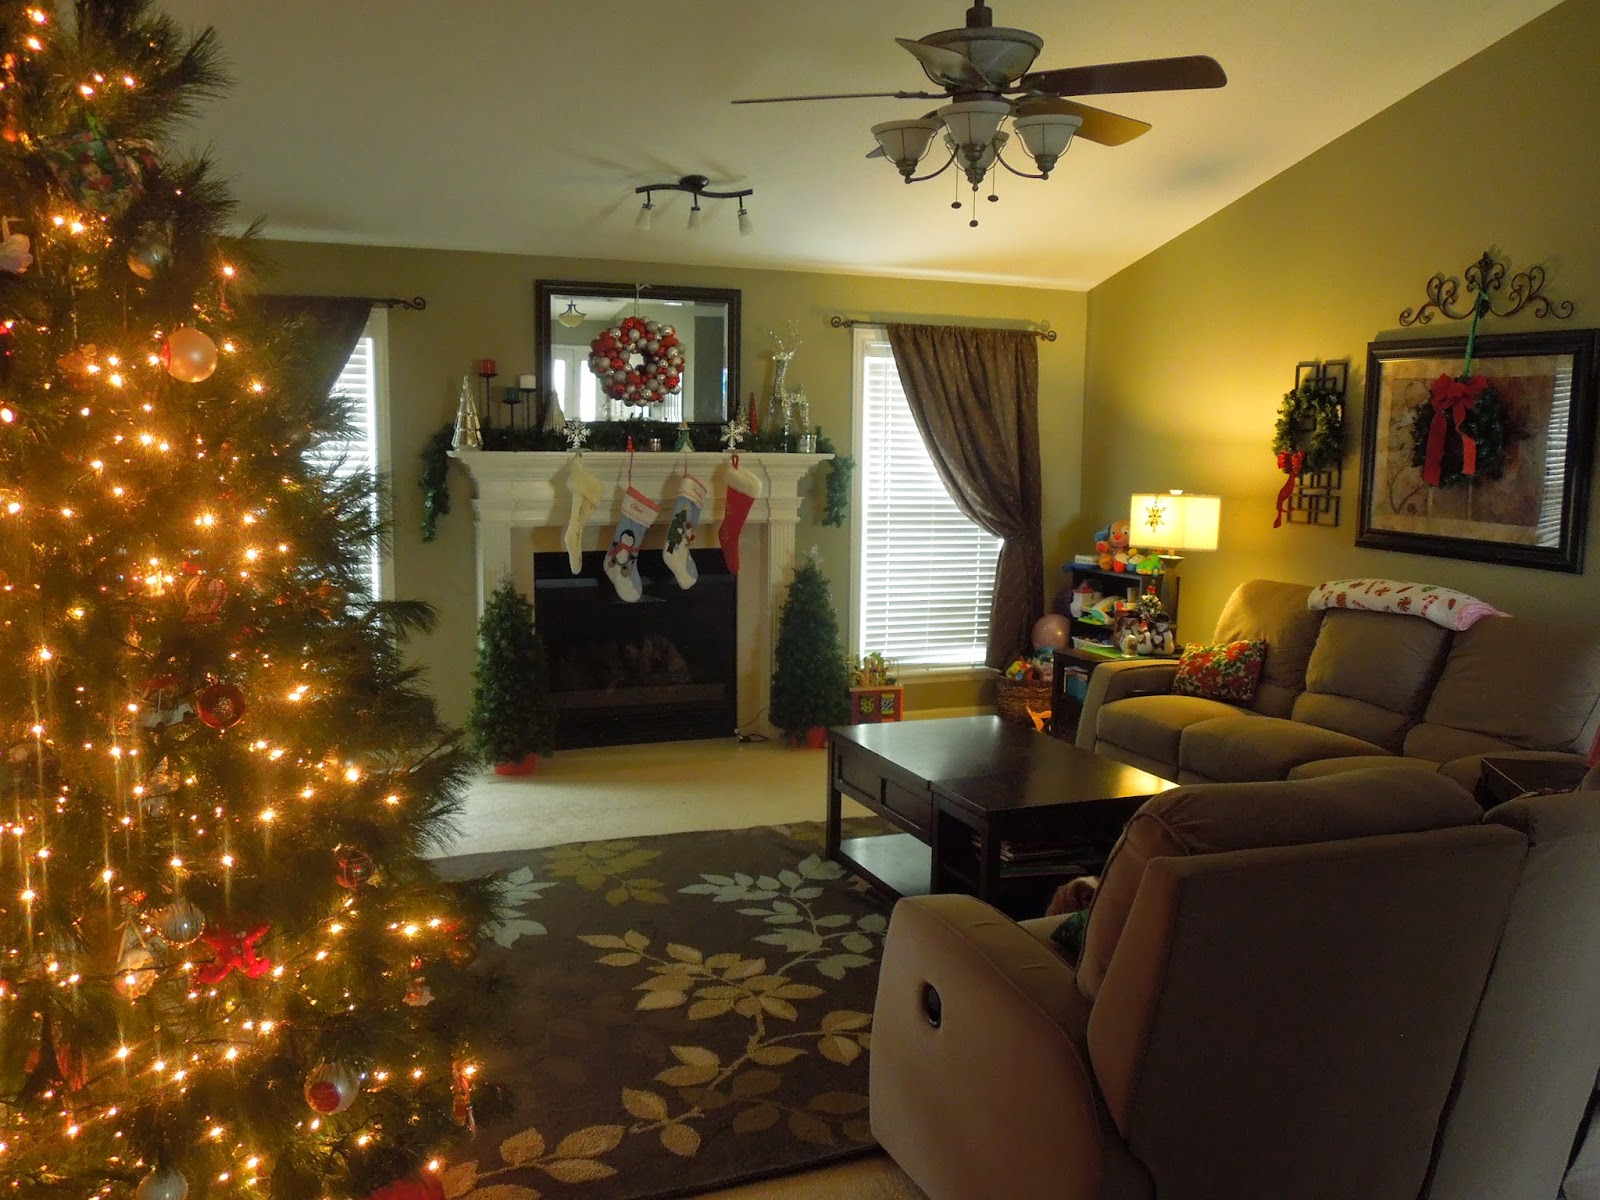
Moving into the family room....
The mantle changes every year as I find new pieces but the ornament wreath has been a fixture since I made it a couple of years ago.

I added some festive pillows and accent pieces to the side tables.  I am also trying out the wreathes for something different this year.
 

One of my favorite parts on our holiday décor, are the little villages we set up in the cubbies in our family room.  These also evolve each year as my Aunt scales down her village and passes the houses on to us.


 Natalie made some special holiday artwork for us this year too! 

The buffet table in the dining room.
 
 
Another view into the dinning room.  

Our entry table by the front door.

Lastly, our Christmas tree.....in a new spot.  :)  And also very real which is new for us too!

Every year growing up my family and I would trek out to a Christmas tree farm about an hour and a half away to find the perfect tree for our home.  I have the absolute best memories from these trips.  Some of my very favorite childhood photos are of us on the hay ride up to the trees or standing in front of the "chosen" tree.  I have wonderful memories snowball fights, arguing over the perfect height/circumference/needle type, and enjoying hot chocolate and kettle corn on the drive home.
With my mom and brother ready to find the perfect tree.  As a side note, how much does Natalie look like me here?!?  She is definitely my mini-me :)
 
A couple years ago I convinced my hubby that we needed to start the tradition with our kids.  We missed last year but I had a great time this year - well most of us did.  ;)  I have a whole post planned about our adventure but I will leave you with these tidbits from our trip.
 I think this picture perfectly sums up our life and family right now.  Matt cutting the tree, Natalie laying on him because she wants to help but doesn't want to get dirty and Chase with a stick annoying his sister.  So much fun! ;)
Lol....this will definitely be a favorite family picture. 


Thanks for stopping by!

Tuesday, September 9, 2014

Come on In....Master Bedroom!

Linking up with the lovely Andrea for her Come On In series!


I'm not going to lie this post is a bit hard for me to write as my master bedroom is in serious need of some decorating love.  Not to mention our bedroom is where my will to fight my husband on his clutter loses steam.  And I hate that.  I am willing to put up the fight in the rest of the house but the stack of god knows what on his dresser?  I can't even go there.  Which is a real shame because I feel like when you have small kiddos, your bedroom becomes a refuge of sorts. 

Now don't get me wrong, my kids are always welcome in my bedroom.  We love to cuddle in bed and watch cartoons.  The kids are always in my closet trying on my shoes and scarves and generally wrecking havoc on my organization.  Natalie also loves to change out the pictures on our nightstands.  :) 

Though I want our room to not give me anxiety when I step foot in there....which it does from time to time because of the chaos.  If I am being truthful, I think I am less concerned about the clutter because our room is not quite pulled together in terms of décor.  It has a mish-mashed feel of items that we tried to make work in there and a design aesthetic that has grown old in the 2 years since we moved into our home.

So I am sharing a little piece (what is presentable!) in hopes of getting ideas from all you wonderful ladies!  Can't wait to see everyone's master bedrooms!

Looking in from our door.  It sure looks like our bed takes up the whole room!  We have about 2 feet on either side of our bed to the walls and I have really struggled with how to fill the space on the floor as well as the walls.  It would be ideal to have a quiet reading space but I am sure the chair will just end up being a clothes holder!
In this picture, you can also tell that we used 2 shades of grey to paint our room.  The wall behind our bed, the ceiling and our master bath are all a shade darker than the 3 other walls in our room.

 From the other side of the room.  They are not in the picture but to right of the bed is my dresser (on the wall with our door) and to the left is my hubby's (on the wall with our windows).

Hanging over our bed are 2 canvas photographs that we took while on our honeymoon in Kauai, Hawaii.  I adore those pictures and they hold such wonderful memories but I am not sure they are best suited over the bed.  I think they may look nice stacked on my side with the aforementioned reading chair/nook.
The middle canvas is something I made with vinyl and thumb tacks.  It says "Together is our favorite place to be".  I like that it ties in with the honeymoon pictures. 
Try not to be jealous of my bed making skills!  Ha!!!

This is a picture from our wedding that my Matron of Honor gave us.  During my wedding planning I found a beautiful blessing called the 'Blessing of the Hands'.  It made me tear up every (yes, EVERY and even to this day) time I read it so I knew it had to be incorporated into our ceremony.  Our priest did an amazing job reading it and I love that we have the words and picture of the moment from the ceremony in our bedroom.

I couldn't find a link to the exact blessing we used though there are many versions online.  If you are curious here is the blessing as we used it....
These are the hands of your best friend, young and strong and vibrant with love, that are holding your on your wedding day as you pledge your commitment to each other and promise to love each other all the days of your life. 
These are the hands that will work long hours for you and your new family. 
These are the hands that will work along side yours, as together you build your future, as you laugh and cry, as you share your secrets and dreams. 
These are the hands that will hold each child in tender love, soothing them through illness and hurt, supporting and encouraging along the way, and knowing when it is time to let go. 
These are the hands that will countless times wipe tears from your eyes, tears of sorrow and tears of joy.
These are the hands that will hold you tight as you struggle through difficult times, they will comfort you when you are sick , and console you when you are grieving.
These are the hands that will give you support as you encourage each other to chase down your dreams, together as a team, everything you wished for can be realized.
These are the hands that will love and cherish you through the years, for a lifetime of happiness.
And lastly, these are the hands that even when wrinkled and aged will still be reaching for yours, still giving you the same unspoken tenderness with just a touch.
God, bless these hands that you see before you this day.  May they always be held by one another.  Give them the strength to hold on during the storms of stress and the dark of disillusionment.
Keep them tender and gentle as they nurture each other in their wondrous love.  Help these hands to continue building a relationship founded in your grace, rich in caring and devoted in reaching for your perfection.
May Lauren and Matt always see their four hands as healer, protector, shelter and guide.  We ask this in your name.  Amen
 
So there it is!  I absolutely adore the wall colors in our room.  They are hands down the perfect shades of grey and really allow us to decorate with many different accent colors.  When we initially moved in we had a very neutral, grey bed spread and it was just too blah, hence, the very statement-like bedspread we have now. 
 
I think this year will be a good time to revamp the whole room and figure out how to fall in love with my bedroom!  So bring on the ideas, ladies!!!


Tuesday, July 15, 2014

Come on In ... Kid's Rooms! And a Kitchen update :)

Hi all!!!  It's time again to link up with Andrea at Momfessionals for her Come On In Series.  Today it is all about our Kid's Rooms!  I have a very special place in my heart for our kiddo's rooms as I put quite a bit of love and time into planning the "look" of each room.

When we brought Natalie home we were living in a different home and preparing to put the house on the market.  I knew I couldn't do an over the top nursery (thinking about resale!) nor did I really want to since we didn't know if we were having a boy or girl.  So when we moved to our new home I really wanted to make sure Natalie had a fun girl room.  We left Chase's room unpainted for about 8 months after we moved in.  At move in time I wasn't pregnant (though we would be soon after!) and I wanted to make the room either very girly or very boy for our new baby. 
 
Natalie's room on the day we moved in
 
Putting the Grandpas to work removing the wallpaper border
 
Working on the chevron wall with my dad.  Taping the lines took FOREVER but it was so worth it!
Don't paint the sections with the tape pieces!!!  ;)
 
The finished product!!!  I have no idea why it looks like I used 3 different paint colors (though it looks like that in person too depending on the light) but the dark stripe is the same color as the other 3 walls.
 
As it looks today with all Natalie's special touches.  ;)
 
Lots of purple, pink and princesses! 
 
Her reading nook.  Natalie loves to read and look at all her books. 
Makes my heart happy that she shares my love of reading.


Chase is right next door to Natalie.
Both kiddos have wreaths on their doors that were used at their birthday parties.

I don't have a before picture for Chase's room but it was almost identical to Natalie's...just without the wallpaper border!
I wanted a very 'boy' room and a good contrast to Natalie's girly room. 
Looking in from the door.  Very green, blue and sports!

 
His toy corner.
 
I spent quite a bit of time searching for ideas on Pinterest and fell in love with this HGTV room.


Back in May, I linked up for kitchens and dining rooms.  Since then we have changed out our appliances and added backsplash. 
If you missed the original post check it out here.

I forgot that I had this before picture from the very first time we saw the house.
 
 
Before the new appliances and backsplash
 
 
After!
 
I love the new look!  Now I just need to figure out how (or if) I want to decorate the top cabinets.  Any suggestions?!?
 
 
Thanks for stopping by!


Friday, June 27, 2014

A little of this, a little of that

Just a couple random things this week that we have been working on. 

We were in desperate need of some patriotic décor around here so I decided to get crafty.  My two projects?  A chevron flag and a material banner.  The banner was considerably easier than the flag but both were relatively simple overall.  I'm thinking these two items may become the foundation of our summer mantle - from Memorial Day to Labor Day.

 
I was inspired by Momfessionals and White Cottage Boutique but decided to put my own twist on the flag since that is what DIY is all about!
 
I forgot to take pictures of the first couple of steps but basically I was on a budget so instead of buying strips of wood, I went with a 2 ft by 2 ft piece of plywood for $6 at Home Depot.  Plus it didn't require me to use a nail gun and for that my hubby was thankful!  I originally thought I would be ok with a square flag but after looking at the board more I knew it needed to be cut.  So I asked Matt to take a little off the bottom.  I spray painted the whole board white without sanding it down.  Oops, that was definitely a no no.  The board was a flaky hot mess and kept the painter's tape from sticking well.  Lesson learned.
 
Next I painted the top corner blue.  I just eyeballed it but looking at the final product I think I should have made it a little larger.
 
From there I followed White Cottage Boutique's instructions on the tape for chevron.  I wanted a few more stripes so I went with a thinner tape.  I should have followed her instructions a little closer though....she knew to sand down the wood!  Ha! 
 After all the tape was down, I used an exacto knife to cut out the tape sections that would be painted.
 Up next was the red paint...
 After the red paint dried, I moved on to the stars.  I found a stencil at Hobby Lobby for a couple bucks and knew it was worth every penny of my sanity after completing the chevron stripes!

A close up of the finished product.  As you can see my stripes are not super straight and the red paint did bleed a little but overall I love how it came out.  It definitely has my personal touch!  Ha!  :)
I didn't take any step by step pictures of the banner making, but it is pretty simple.  You just need a mixture of material that compliment each other and the theme you are working on.  In the past I have picked up fabric bundles at Hobby Lobby.  They are the perfect size and usually offer the colors I need for $10 before the 40% off coupon.  This time I wasn't in love with the red, white and blue bundle so I decided to pick out my own fabric.  I bought half a yard of each fabric which is WAY too much - unless you want to make 3 or 4 banners!  The problem was really making sure the individual fabric pieces were long enough to tie so honestly I'm not sure if you could buy less yardage.  Anyway, it is as simple as cutting strips of fabric and tying them around twine or yarn or string in a pattern.  Voila!  You have a cute, decorative banner!

In the end I spent under $10 on the flag and around $12 on the banner.  Cheap and simple crafts that can make a big statement.   

Next to the outdoors. 

Since the day we moved into our new home almost 2 years ago, I have wanted to paint our shutters and front door.  I honestly disliked the color so much that it made me cringe every time we drove up to the house.  #realtalk

This picture is from the day we moved in but I wish I had a more recent picture because the color has faded into a more pink tone.  Yuck!
Disregard the beautiful, yellow lawn as it was one of the hottest summers on record and the previous owner thought watering the lawn was overrated.  ;)


This picture is a few weeks later at Natalie's birthday party.  It may be just me but I felt like the pink/red/maroon color was too bright and didn't blend well with the rest of the house. 

After almost 2 years of debating and nagging, we finally agreed on a color and painted the shutters and front door!!!  I absolutely adore how it looks now.  It even changed my opinion of the front door!  That is saying something since I really don't love the gold and glass look....but again, I think I was more focused on the color of the door than the intricacies of the design itself.
 
It looks more quaint and neutralizes all the yellow in our brick/roof/siding in my opinion.  Honestly, I can't believe something that cost about $20 and took about 4 hours of time took us 2 years to accomplish.  Another lesson learned - just go for it!  A small change can have a huge impact!

We decided to paint the door one step darker on the Behr color sample card.  The shutters are Scotland Road and the door is Amazon Moss.

Landscaping is up next but right now I am loving the new look!  Oh and I think the hubby did a good job getting the lawn under control  ;)
 
Happy Friday!